Start Movement Training By Learning These Two Moves
Turn your core stability training upside down and learn a new skill that will turn heads
One of the more sarcastic comments we hear about our fine Men’s Fitness cover models is, “Nice body, but what can he do with it?” The none-too-subtle implication being, sure, they look good, but can they move well? Does the function match the form?
A post shared by Lewis Young Fitness Model (@luisyoung_)
A photo posted by on
In the case of this month’s main man, Luis Young (@luisyoung_), there’s little doubt about whether or not his physique is just for show. In fact, it’s more for showing off, as he’s doing in this picture.
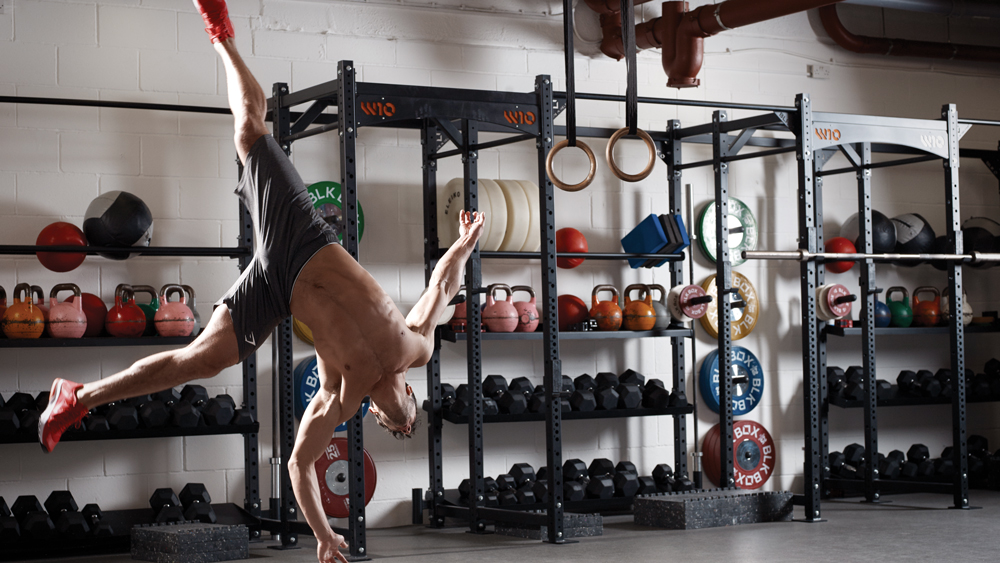
Now, we’re not expecting you to flip your way expertly over to the squat rack next time you hit the gym. But you can follow Young’s step-by-step insight into the strength and technique required to perform such amazing fitness feats.
“I enjoy the fact that I can combine strength and movement and there is so much more freedom,” says Young. “As much as I love compound training, a bench press is a bench press. With movement training you can constantly adjust and progress, and also add a sense of individuality.”
So what’s the theory behind the two exercises Young has selected to get you started on your path to a more acrobatic form of athleticism? “I chose these two moves because, regardless of ability, there is something that you could work on to reach that final position,” he says. “They are also fairly safe and low-impact moves, but still look very impressive.” Just make sure you start with step one…
Flagged Handstand
Step 1
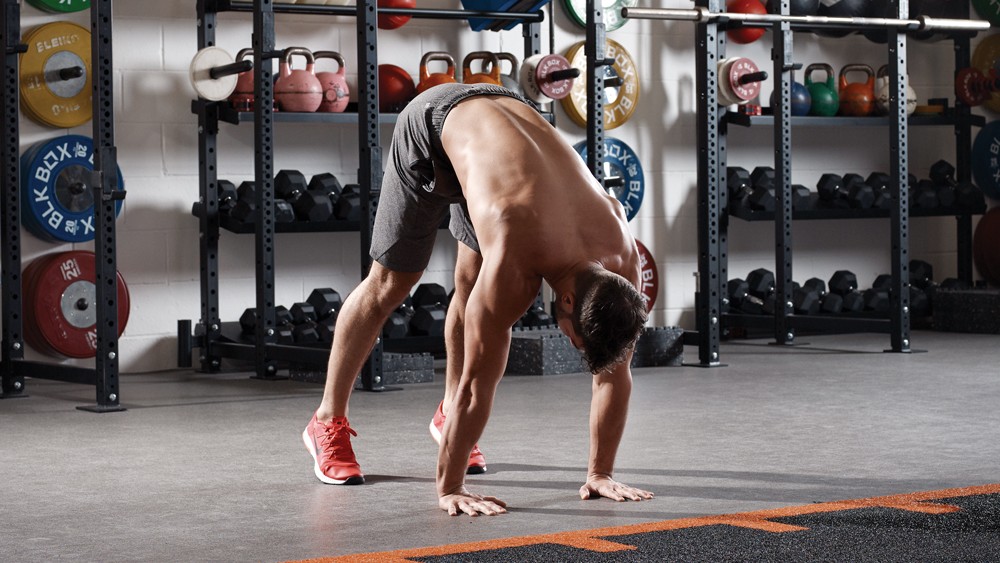
“Place both hands on the floor with hands shoulder-width apart, arms straight and fingers spread,” says Young. “For this step, your feet remain on the floor but you should aim to shift as much of your bodyweight onto your hands as possible. Stay on your toes, and keep your hips high and your legs straight.”
Step 2
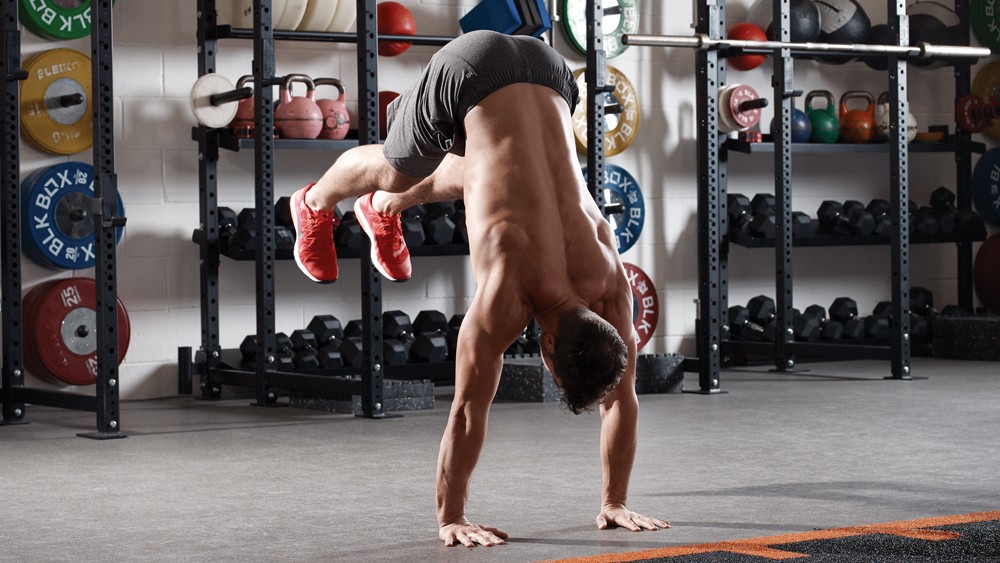
“In this step you are just hopping off your feet and bringing your lower body off the floor,” says Young. “The idea is not to balance the position, but just to get used to the feeling of having the whole of your bodyweight on your hands.”
Sign up for workout ideas, training advice, reviews of the latest gear and more.
Step 3
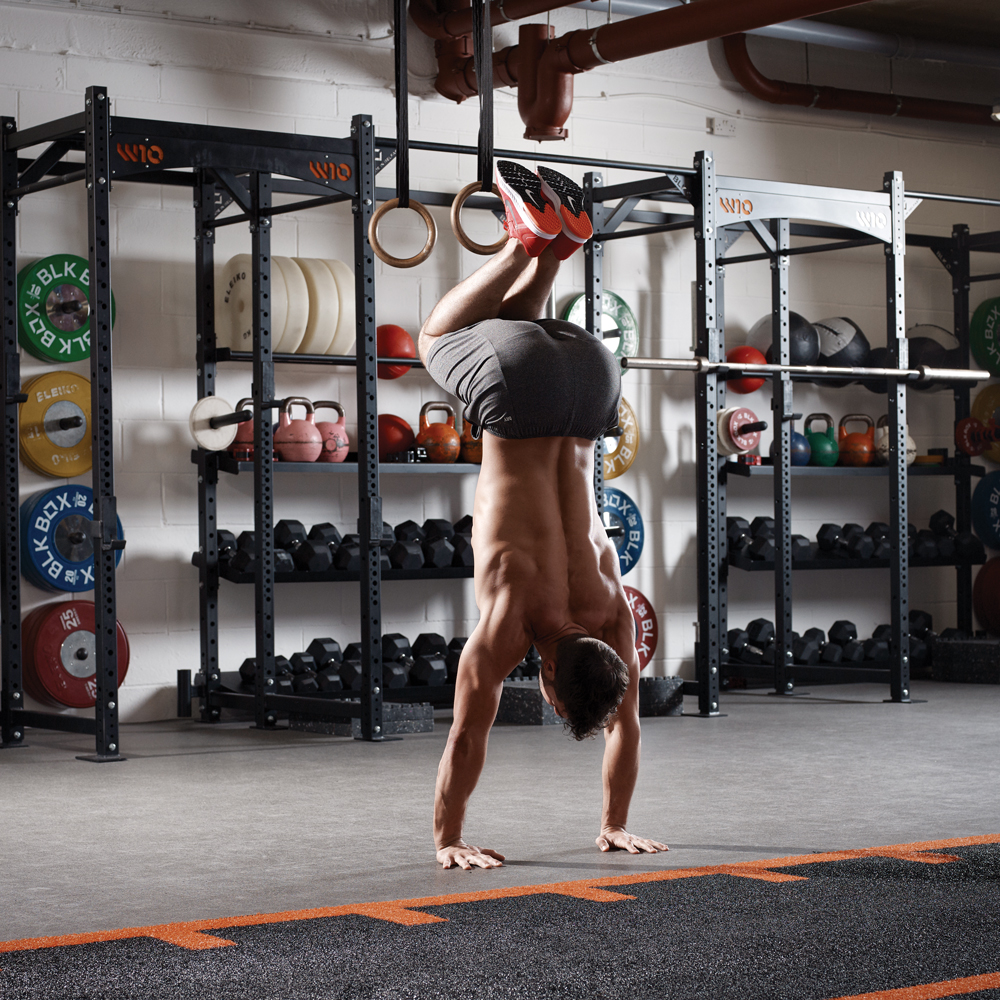
“Now you should try to align your hands, shoulders and hips; shoulders over your hands and hips over your shoulders,” says Young. “Your back should be straight with your legs tucked. This will help to keep your centre of gravity low while improving your technique.”
Step 4
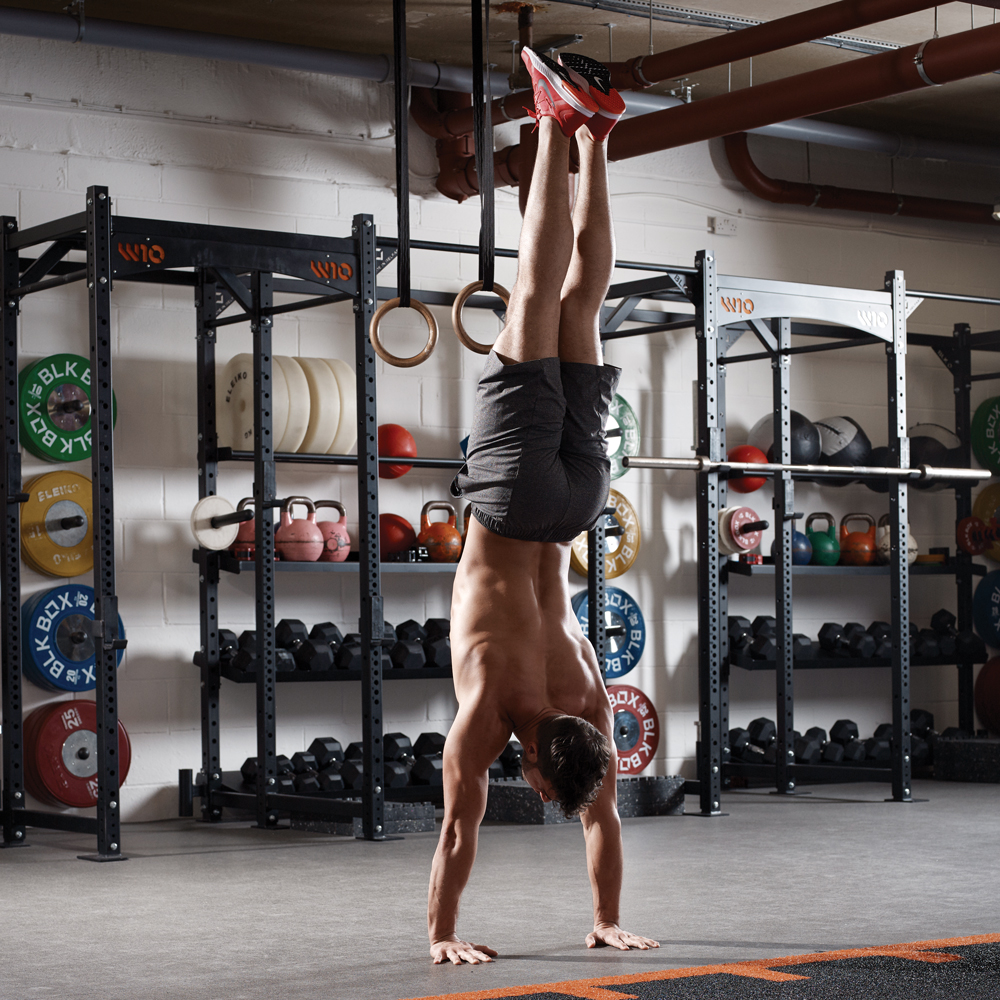
“From the previous position, you now want to fully extend your legs,” says Young. “Hold your core tight, tense your quads and glutes, and push everything towards the ceiling.”
Step 5
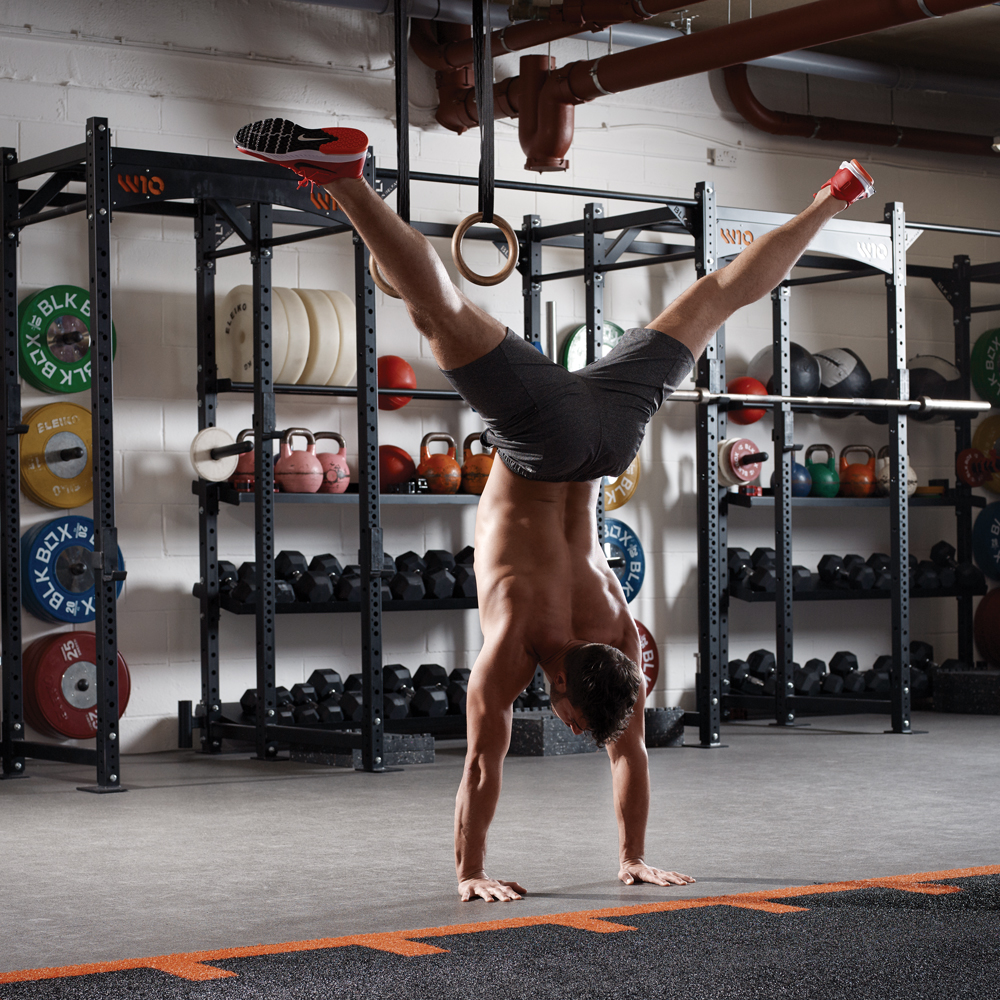
“Keeping your legs straight, slowly bring them apart while keeping your weight centred,” says Young.
Step 6
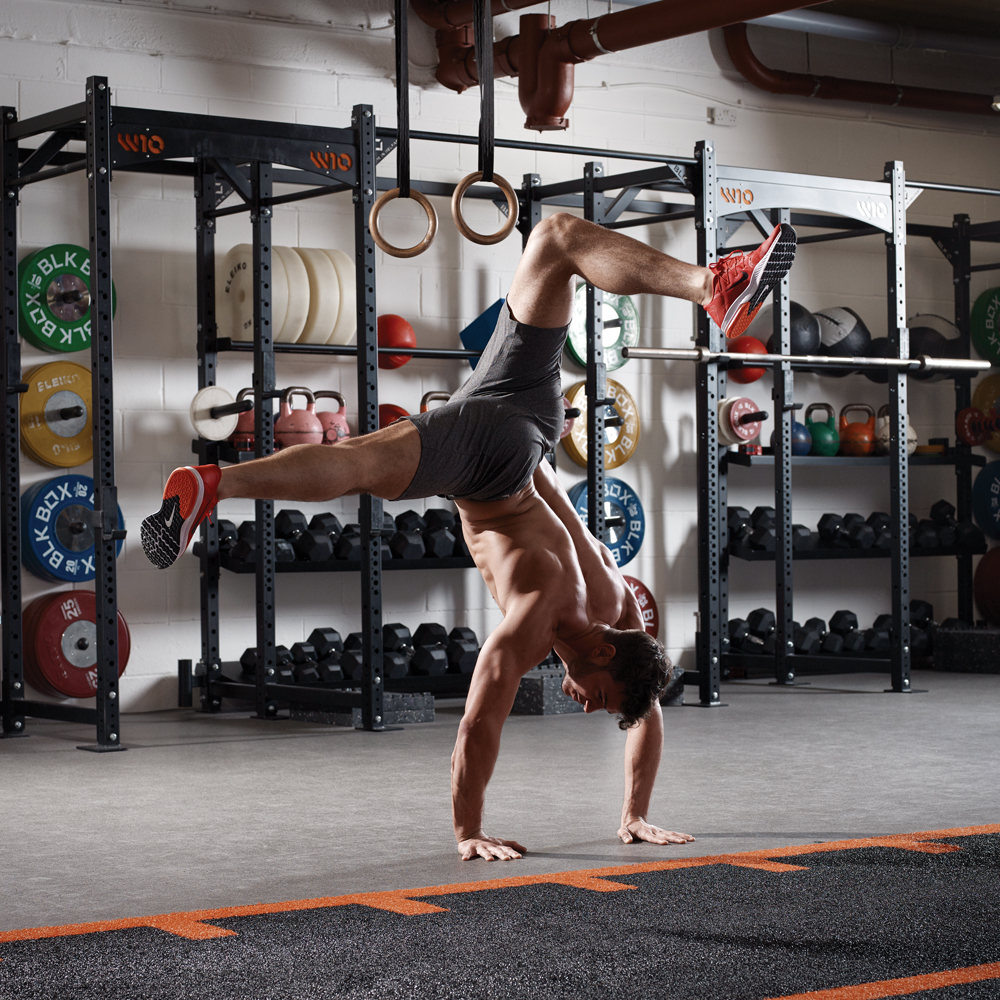
“Lower your dominant leg to one side, keeping it straight and bending the other leg behind,” says Young. “As your leg drops lower, you’ll need to shift your bodyweight to the opposite side so that your weight remains centred.”
Step 7
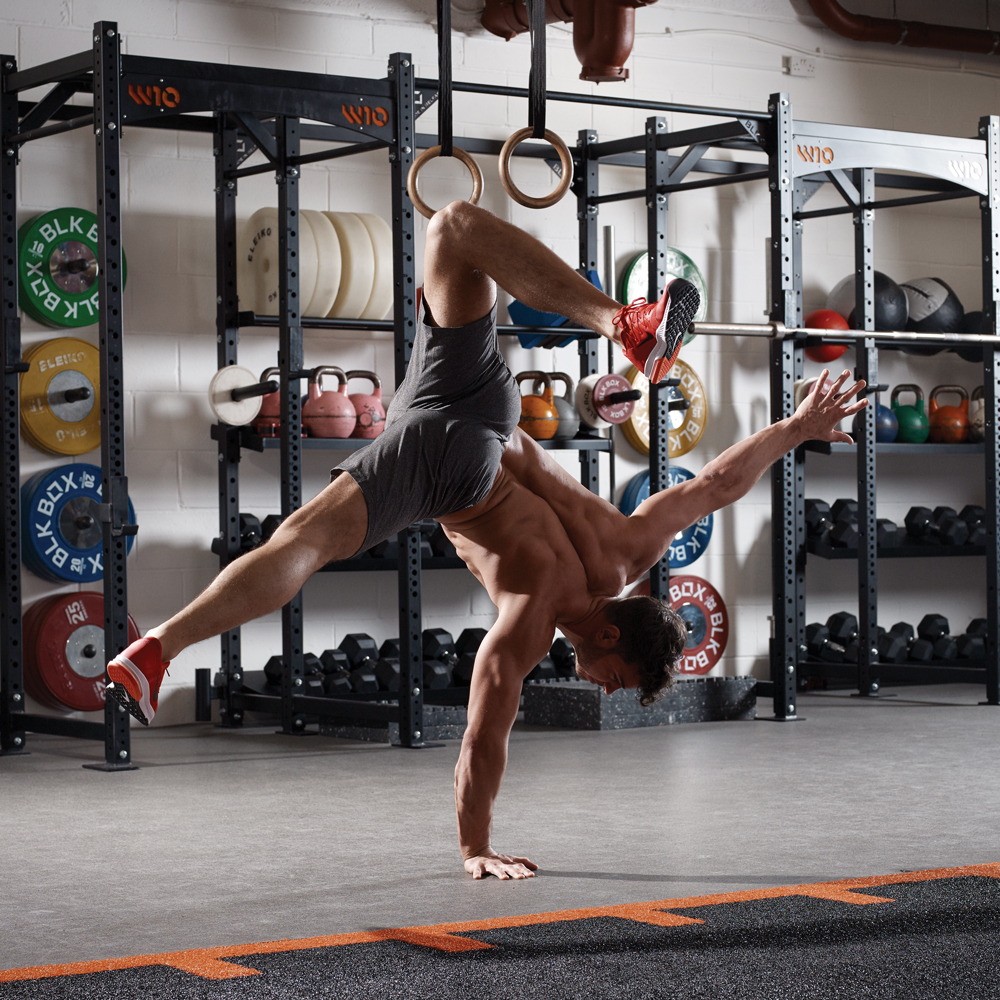
“Once you feel balanced you can try removing your weak hand from the floor,” says Young. “Start by bringing the hand onto fingertips, then try just one or two fingers before completely removing your hand from the floor.”
Expert tip A common error is just falling into and past the position. If that happens, go back and work through the previous steps. Don’t rush it.
It’s working when you feel like you can control your body through the movement and you can actually hold the position.
One-Arm Elbow Lever
Step 1

“Start on your knees, lean your body forwards until it’s completely horizontal and place your elbow on your dominant side as close to the centre of your stomach as possible, just below your bellybutton,” says Young. “Place your supporting hand on the floor to the side for stability, spread your legs wide and keep your feet on the floor.”
Step 2
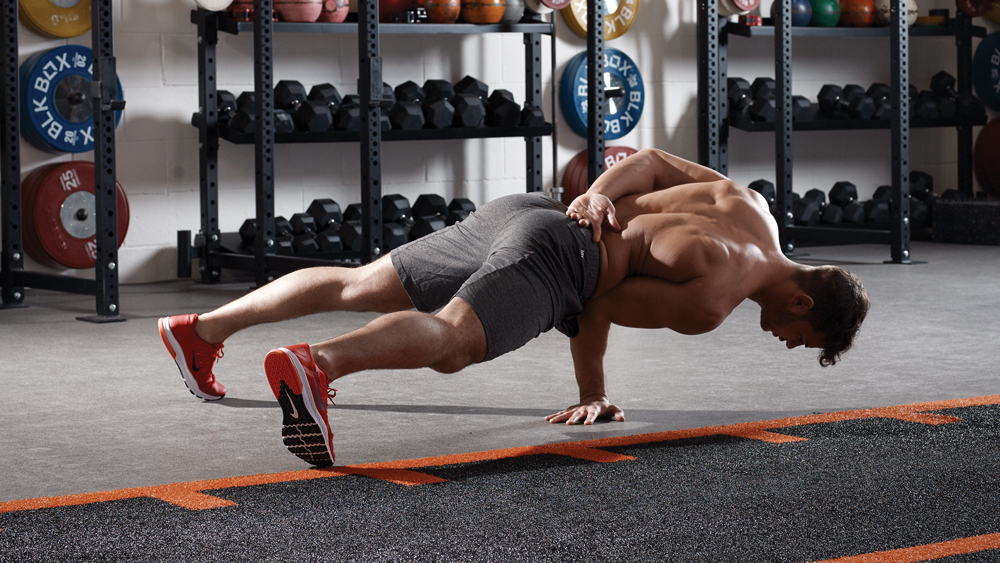
“To get used to the feeling of balancing on one hand, you should first try this with your feet on the floor,” says Young. “Remove the hand that was supporting you from the floor, making sure your weight is centred over your strong hand. When you do this, it is very important that your forearm on your dominant side stays completely vertical.”
Step 3
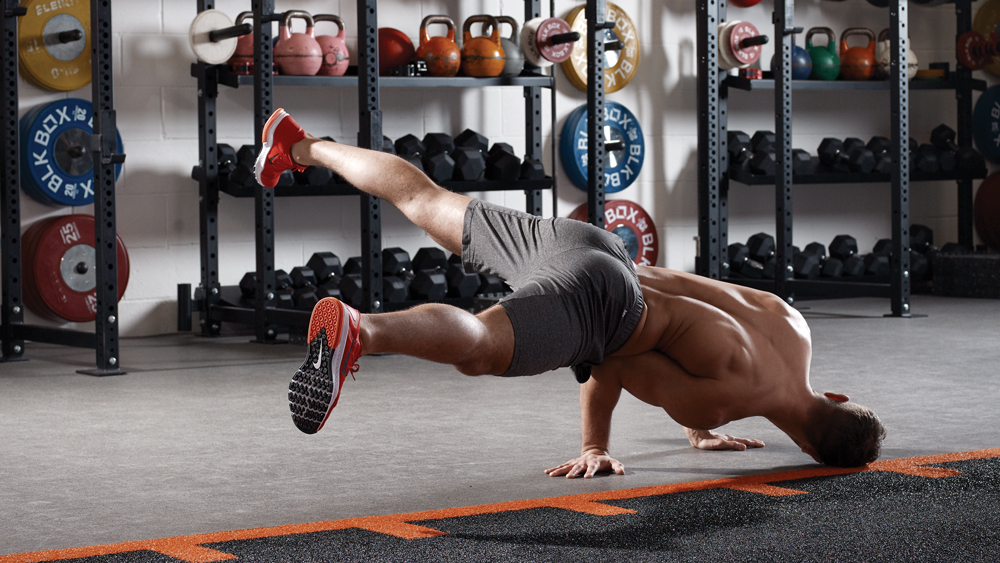
“For this step, place your supporting hand back on the floor,” says Young. “Keep your core strong and legs locked, and then lean forwards until your legs come off the floor and place your head on the floor, facing your supporting hand.”
Step 4
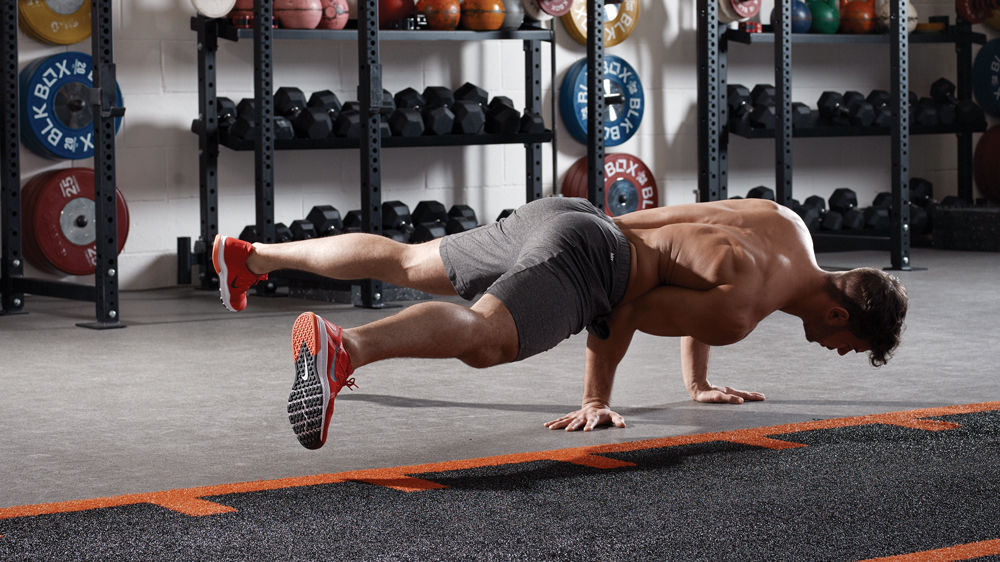
“Bring your head and chest away from the floor, allowing your legs to drop a little but keeping them locked and apart,” says Young. “Your aim here is to try to find the balancing point. Adjust the position of your supporting hand if necessary.”
Step 5
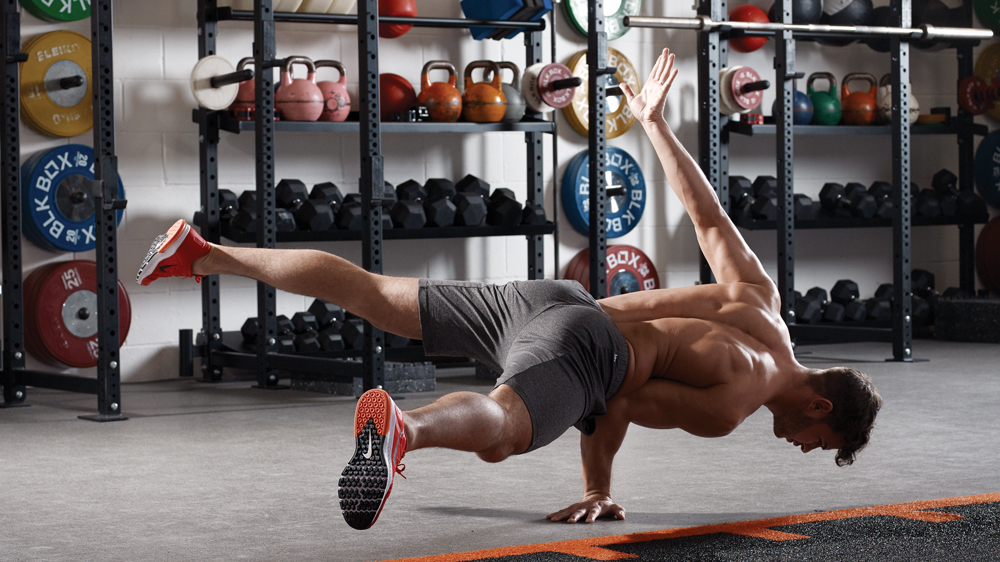
“Remove your supporting hand and make sure your weight is centred over your dominant hand, again keeping the forearm vertical,” says Young. “Don’t allow your legs to drop any further and use your straight arm to help you balance.”
Expert tip Place the elbow on your hip, not your stomach, and make sure the elbow is pressed into the centre of your body.
It’s working when your body is completely horizontal and you feel stable enough to hold it.
